
Dollhouse Makeover

This year back in August I had the great idea to pick up two Ikea dollhouses for the girls that I would makeover for Christmas. I wasn’t really thinking about where we would put them or the amount of time it would take to personalize two, but I with the help of my husband they turned out perfect. It will be fun to continue to update them for the different holidays.
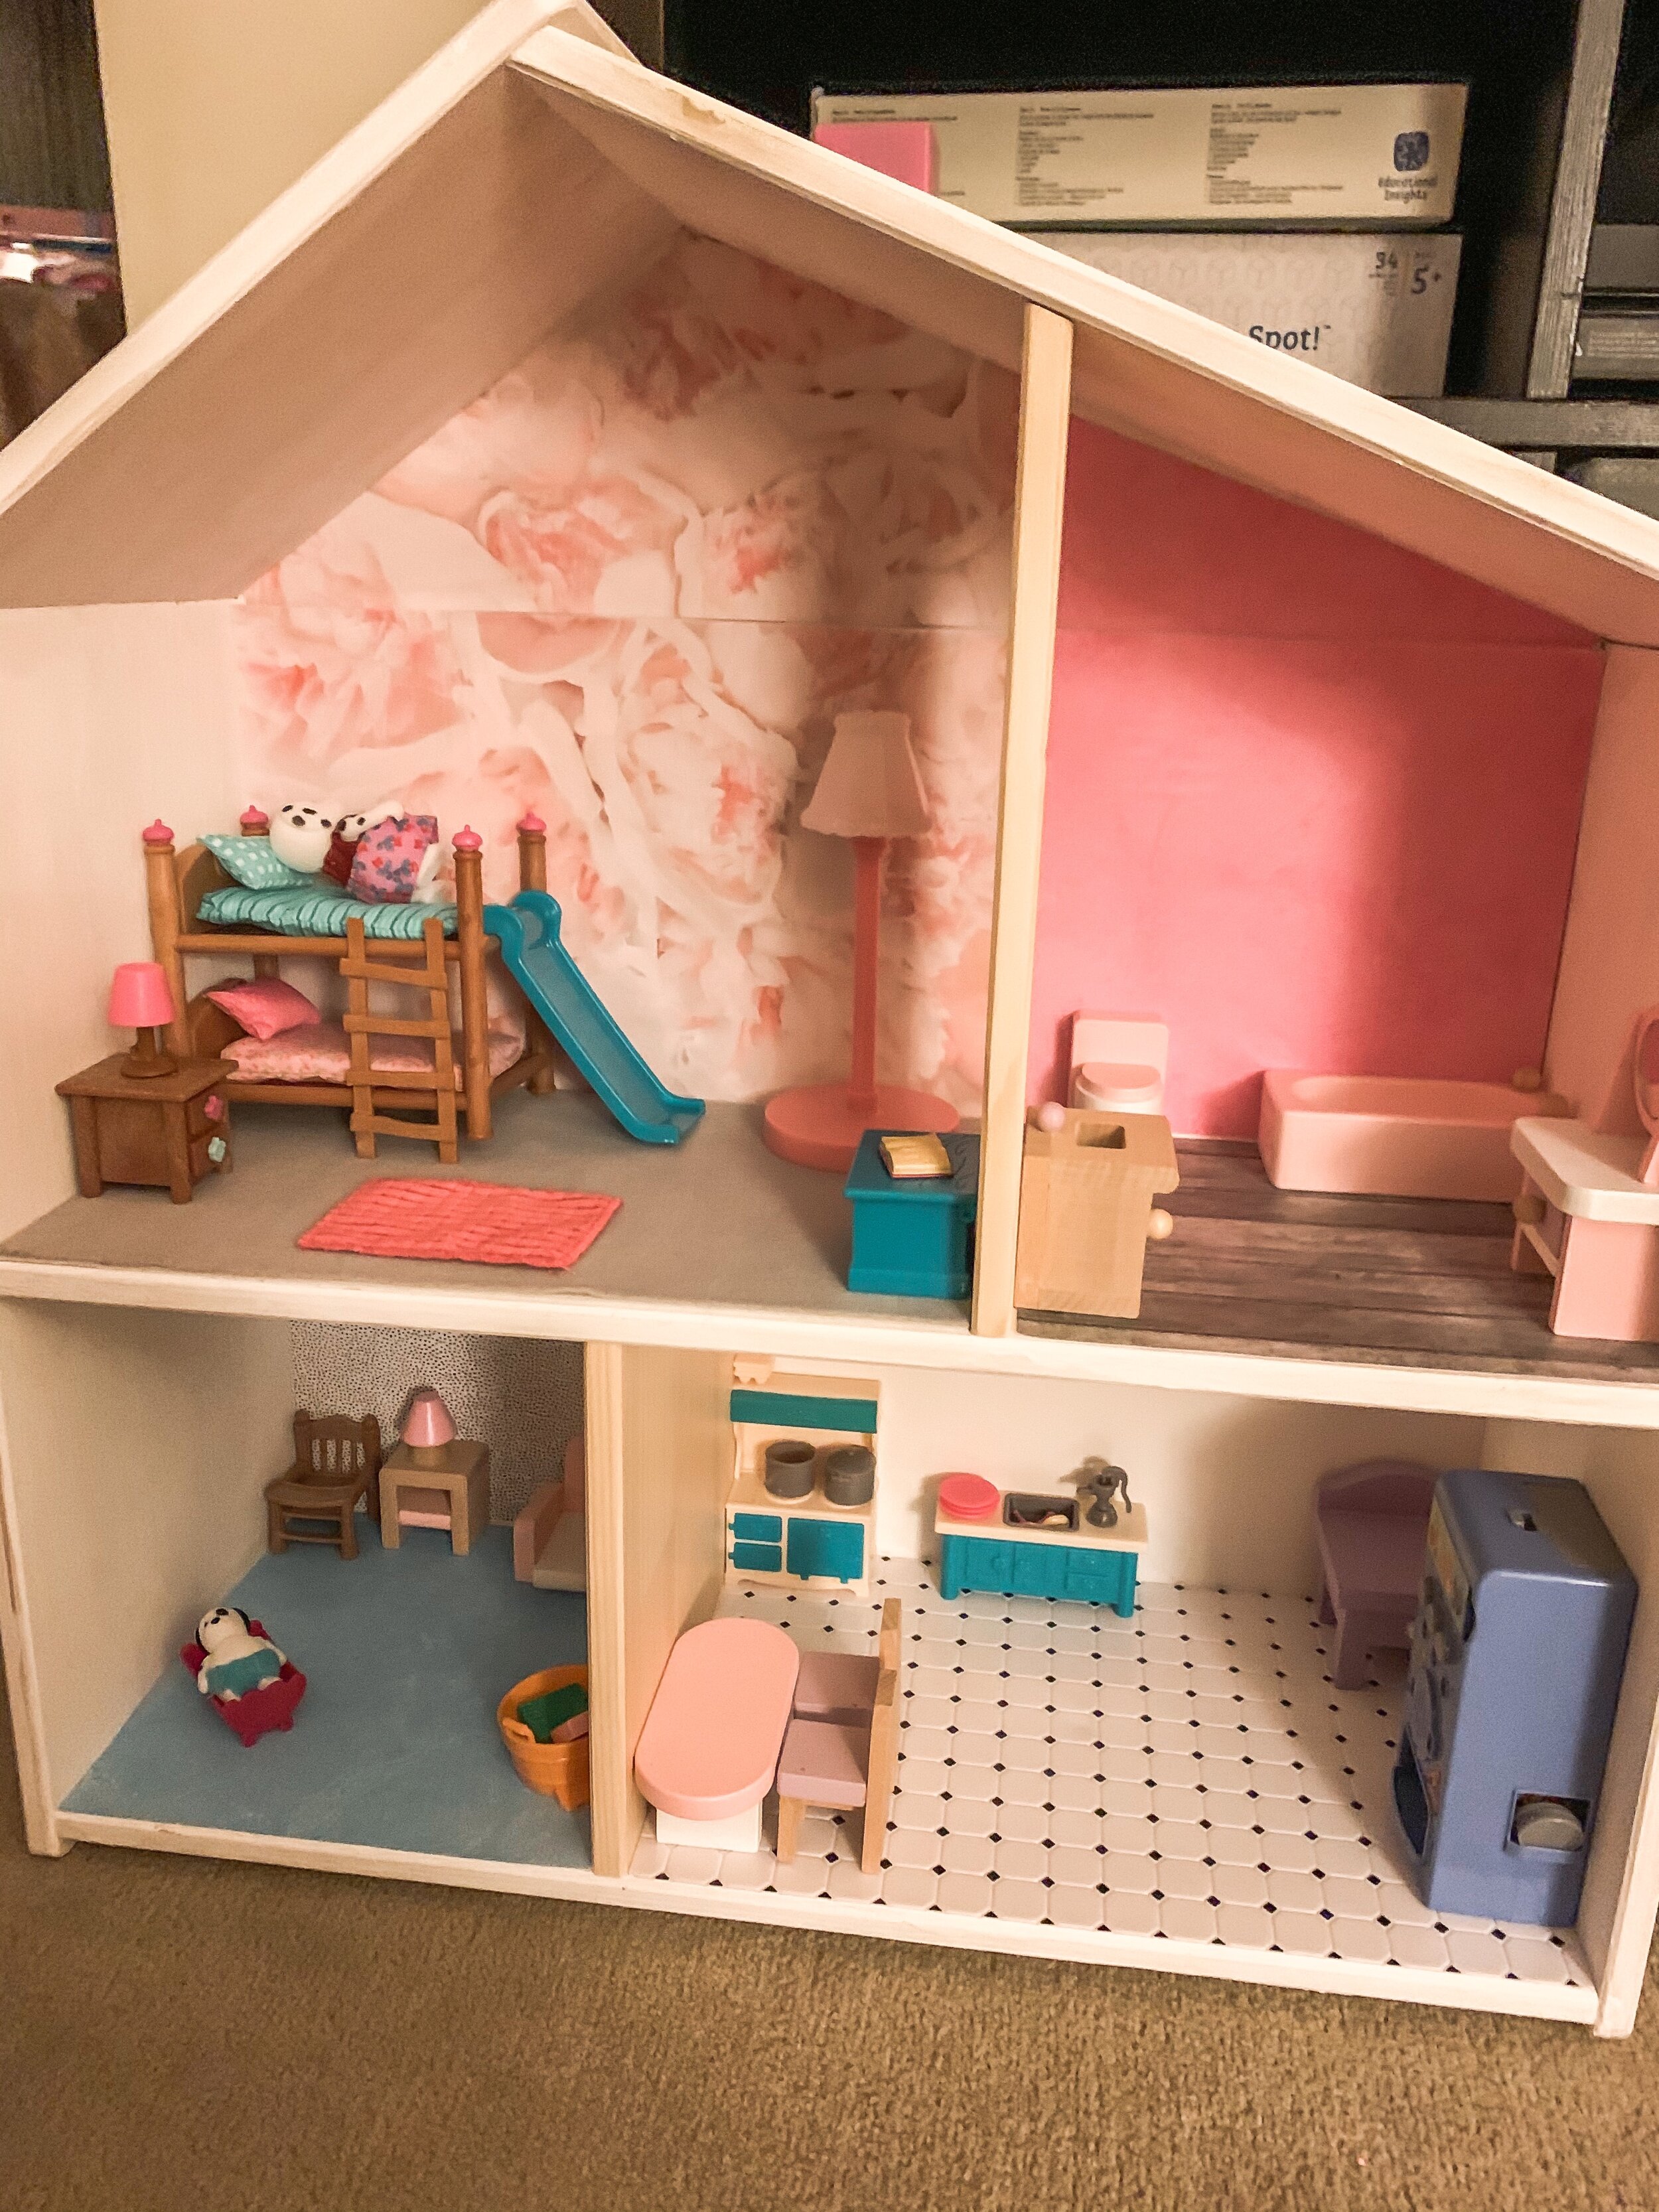
Scott did the assembly and my job was to wallpaper and carpet the interior, as well as figure out the furniture. I have a lot of plans for these dollhouses. I want to really customize the bedding and add some more tiny touches to make them unique for the girls, but that will be things I add down the road.
The Flisat dollhouses from Ikea are each $34.99. We actually have a KidKraft dollhouse that my oldest got a few years ago, but I decided that each girl needed their own because I wanted to make sure it was fair. While they do share, I could see them each playing with their own houses and pretending the people are traveling between the two.

I actually love the idea of mounting the dollhouses to the wall as seen in this picture from Ikea. I am not sure where we are going to put them, but this is such a fun idea!
I started by painting one dollhouse white and left the second one natural. I ordered a large container of paint from Amazon. Personally I like the Apple Barrel paints. I also painted each chimney a different color and picked the color to match the theme of the interior. For the interior decor I wallpapered and carpeted. The wallpaper is actually paper from Michaels and Hobby Lobby. I do have a couple wallpaper books that I may use later if we want to change it up, but I didn’t think my kids would like those designs.
Hobby Lobby also a whole section dedicated to dollhouses so I picked up some carpet and tile. I did run into an issue with one of the sticky tiles and ended up having to return it but the other one I purchased worked really well. I used modge podge to adhere it to the wood. I did a coat on the house and and then a coat on the paper. Once it dried I did a coat on top (except for the carpet) to make sure it was secure.
The hardest part of this dollhouse was measuring and cutting the paper to the right size. I used a paper cutter to make sure everything was straight and that was very helpful. I also told myself that It did not need to be perfect because I’m sure in the future we will change it up again.

All the dollhouse accessories came from Amazon or Target. Hobby Lobby does sell dollhouse furniture and I know you can order on etsy or other sites online if you want to spend a little more. My kids are young and I figure as they get older we can add to it but right now I didn’t want anything too fragile. For the wooden furniture I got this set on Amazon and all the other items were Lil’ Woodzeez from Target. I’ve also seen people use the Calico Critter furniture and DIY it. That looks like a fun project for the future but the Lil’ Woodzeez were on sale.
In the future if I were to ever make another dollhouse or decide to re-wallpaper these, Scott thinks it would be easier to take out a few screws and trace the outline of the pieces for the floors and walls. If you are planning to do this DIY Ikea dollhouse, I would agree with him unless you are really good at measuring. I did a pretty good job but I only put wallpaper on the back walls and tile, wood, or carpet on the floor. I think if I were to decorate all the walls then I would’ve use that method.